Thursday, January 20, 2011

2010 Handmade Christmas Gifts IV : The Final Four


I have saved some of my favorite creations for this last reveal. The gifts I designed were the most fun for me to make. Despite their simplicity, I needed to focus all of my creative beams at once, for long periods of time, in order to both imagine and complete what I had envisioned. The press of time throughout all of the projects created something like a finals week for me (15 of the 17 projects were completed in less than 10 days). Since being out of classes I had missed that press a bit, and also the elation and relief afterward!

Projects #13 and 14 Ascots for Judah


Nathanael and I made these stylish necktie alternatives for Judah using the same pattern Nathanael had used to make ascots for our five groomsmen. This time we chose to make one yellow, because it is Judah's favorite color. The other is white because Judah loves to wear and create fantastically tie-dyed articles of clothing.
To have a look at some of the ways ascots are worn, visit this etsy shop.


 Project #15 Recycled Sweater Clutch (designed by me)
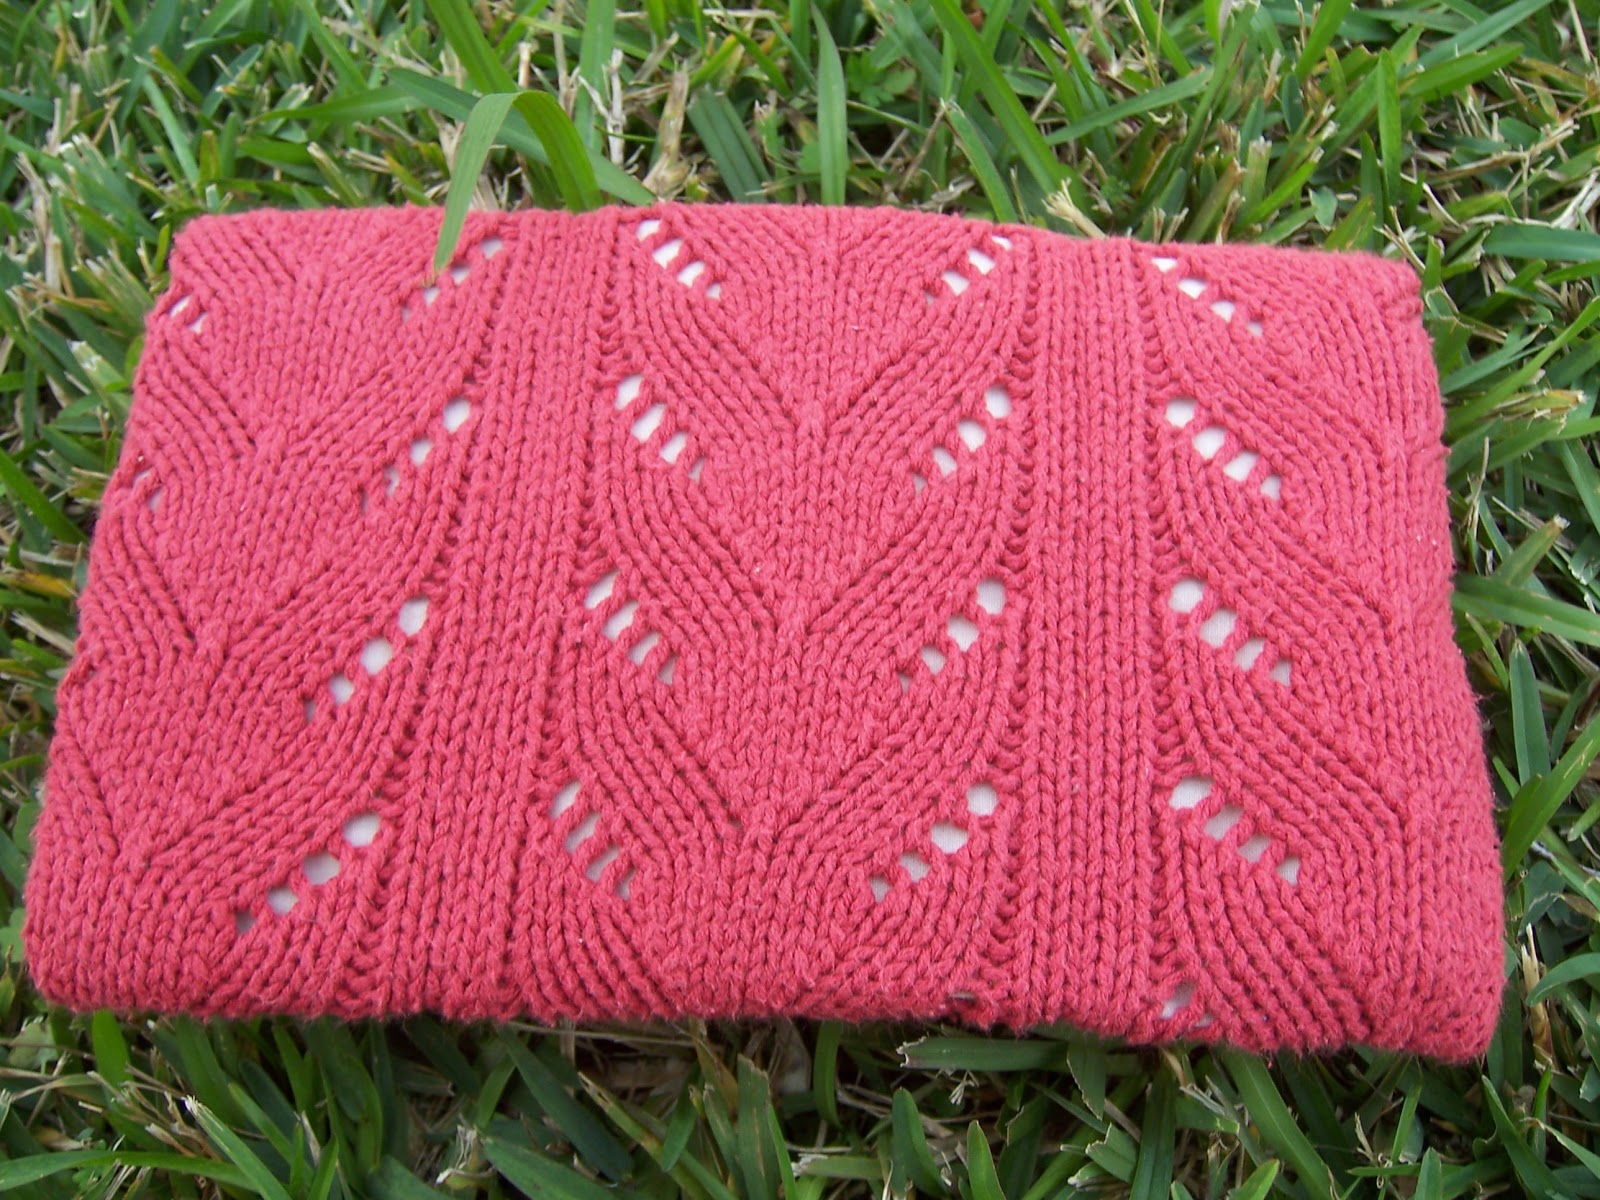
I designed this clutch for Micah's girlfriend Tracey, who is now his fiancée!

 
 I purchased a fancily knit cotton sweater at a charity store, and I had it in my sewing box for a year while it waited for a project where it would be shown off properly.

 
Sewing sweaters is a little tricky, so I tacked the knit to layer of muslin to be viewed through the design, put thick interfacing to stiffen the clutch, and another layer of muslin to line it. I was really happy with the result, and I have a little bit of this sweater remaining, so my mind has been creating more in my moments before sleep...you may see more of this knit sometime this year. 


 Project #16 Bunting Banner Clutch (designed by me)

 
 I designed this clutch for Gabe's girlfriend Nelly. The basic shape is the same as the sweater clutch, but a bunting banner of eight fun prints embellishes the front. Two are recycled from our Grandma's shirts, one from a thrifted shirt, and two are scraps of prints that will soon be appearing on the shells of turtles in my etsy shop (when it opens).
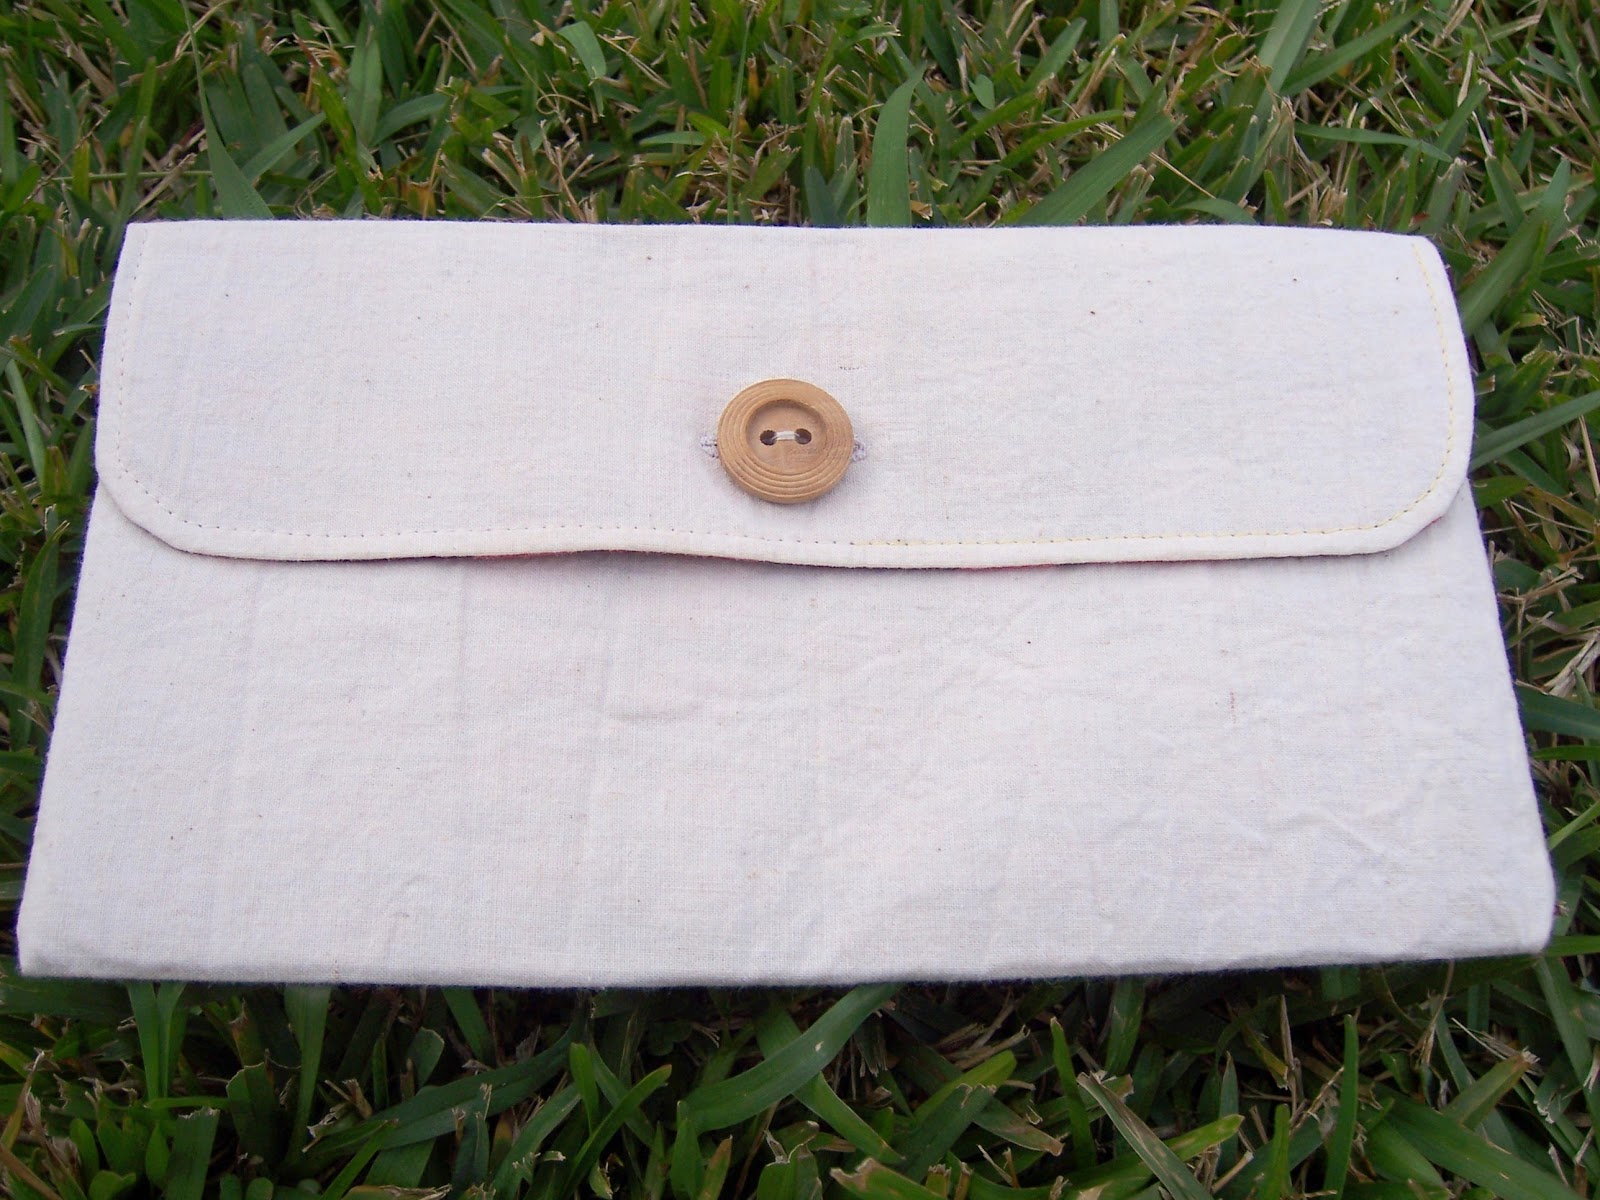


 The leaf lining and purple plaid pocket are touches I love. Nathanael helped me make the decision on those.

 
 These clutches could be used instead of purses, or as laptop accessory bags. Are they something you would be interested in seeing in my shop eventually? Would you like to follow a tutorial to make one yourself?


Projects # 17 Rayon Ruffle Purse (designed by me)

 This purse took more of my brain power and time than any other project this season. But I love it. And now that I have it figured out, I could do it again without so many episodes with the seam ripper. I designed this one for Judah's girlfriend Jane. Her favorite color is also yellow, but a little on the softer side.

 All of the yellow is a rayon of peculiar texture (waffled?) that I cut from a thrifted long straight yellow skirt. The strap was actually not sewn, but is the hem of that skirt very carefully flipped inside out (by Nathanael, who is stronger than I...ok so maybe it wasn't carefully flipped). Believe it or not the ruffles were the easiest part. Want to see my ridiculous inspiration for the shape? Of course you do. I don't think I have to worry about copyright infringement on that one.


Can you tell this project was my favorite? I was so excited to give it to Jane, and she totally loved it!

Saturday, January 15, 2011

2010 Handmade Christmas Gifts III

    It is difficult to decide what to give people for Christmas. 
You know this.
I always appreciate the challenge, but as the family grows my brain gets more and more baffled by such decisions. Therefore, each of the gifts in this post was inspired by a blog I came across. Before I started planning Christmas gifts for 2010 I read a blog or two here and there, but once I realized how many ideas I would need to come up with I began intentionally (perhaps frantically) seeking out craft and sewing blogs to inspire me. As it turns out, the craft blog world is tightly interwoven, so once I found a few that had good ideas, they led me to others. The three family members listed here were the people I had the hardest time brainstorming for, but I am happy with how each of the projects turned out for them. Probably my greatest resources in discovering superb project ideas (besides google, of course) were the annual Sew Mama Sew Handmade Holidays gift idea lists.


 Projects #8 and 9 Hand warmers and Foot warmer for Micah


These rice filled hand warmers can be microwaved briefly, and then placed in your jacket pockets to keep your hands toasty. They are also good for soothing ear aches without making your whole face hot while you nap.
I followed the hand warmer tutorial on the blog no big dill, then made them a little fancier by adding stripes of 5 fabrics instead of choosing just one. These hand warmers will smell particularly good because they are filled with popcorn rice, a splendid local aromatic variety.


I used the same technique and designed a foot warmer bag, which will be nice for cold afternoons or nights. I chose to make it long and narrow so it can also be used to warm sore muscles, and especially sore necks. This one is filled with both rice and beans, but if you make one you could fill it with rice, beans, or even feed corn (like they did on no big dill with their foot warmers).


Projects #10 and 11 Flat Iron and Curling Iron Travel Cases for Megan


 I was really excited when I came across the tutorial for these hair iron travel cases (there actually are two there in the second picture). I think they are perfect to help my stylish younger sister travel neatly, without melting any hairspray bottles, or arriving at her destination to a knot of cords. As you can see I used the same combination of materials as I did on the art tote for my Mom, but I added navy bias tape to give it a little different spin. I found this tutorial on the blog Crap I've Made. It doesn't really have my favorite name, but I found some other interesting tutorials there, including rubber cement dyed eggs, and a fancy laptop sleeve.


Project #12 Charging Station for Gabe


This charging station is basically a pocket that hangs neatly on your phone or camera charger box while it is plugged in to the outlet. This is especially useful when the only available outlets are in hallways or other high-traffic locations where there are no places to set your phone, but you'd rather not put it on the floor. I found this pattern on the German blog sew-mad (I don't speak German, but she writes her blogs in both German and English). It was simple and fun to make because thick interfacing makes the station stiff enough to stand up on its own. The middle picture of it shows you that I used the button hole stitch to embroider the edge of the circle, which was the most time consuming part for me because Nathanael's Singer 15-91 from the 40's does automatic button holes. This means after every third of an inch I had to turn some knobs and readjust the fabric, which is why the stitches are a wee bit wiggly after my three times around the circle.  I was pretty excited when I was finished with this one...but I really liked the finished product so I might just make another.


I have a few gifts left to show you from Christmas 2010, so don't go too far!


Tuesday, January 11, 2011

2010 Handmade Christmas Gifts II

For the second instillation of Christmas gifts, I am proud to present you with...

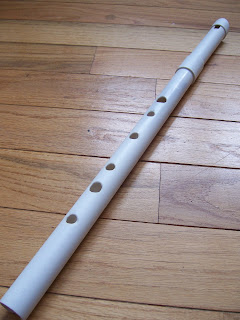
Project #5 Penny Whistle for Seth (made by Nathanael)

    
   This gift may be plain in appearance, but the sound it makes is magical. Nathanael and I had a hard time giving this one away; he because he loved playing it, and I because I was constantly serenaded from the moment he carved the last hole. In general I appreciate penny whistles, but the fact that he used a low D scale on this one allows for the most lovely music. The body of the whistle was constructed out of PVC, and the inside of the mouth piece (as you can see below) is made of wax infused pine. The top of the whistle is detachable so that you can create pipes that produce different scales, while using the same mouth piece (the most time consuming portion, especially considering the time to carve the wood and boil it in wax).


I hope he makes another soon.


 Project #6 Blue Jean Potholder for my Dad


 You may recall that we made some blue jean potholders last year as well. This year I made one for my Dad to match the Blue Jean Apron Nathanael made for him last year, and also because a heavy duty potholder always comes in handy. The design is modified from last year to allow more grasping flexibility (since the fabric is so thick), and to prevent any holes from forming where the thumb meets the hand...a very important area to protect...very very important.


During the gift exchange some people voted to add eyes and teeth to make it a shark.


But even plain, it can be stylish in all sorts of settings.
Project #7 Blue Jean Apron for Nathanael's Dad (made by Nathanael)


After last year's apron for my Dad came out so stunningly (sorry, we actually posses no pictures of that one, folks), we decided Nathanael's Dad would probably love one too. Nathanael composed this rugged apron out of a single pair of jeans, in a single day. He always amazes me. The strap pulls through the sides on the upper portion of the apron, creating a completely adjustable neckline without the need for knots, and all pockets remain intact for carrying small kitchen necessities.


Nathanael's Dad is taller and more broad shouldered, so it fits him quite nicely...if you think it looks silly on Nathanael you should see it on my short self.


 This is pretty much kitchen armor you are looking at.

Isn't he skilled?

Sunday, January 9, 2011

2010 Handmade Christmas Gifts I

Spending time with each of our families during the winter holidays was fantastic. Other than additional time with all of them, we really could not have wished for more.
  First, we spent the week surrounding Christmas with Nathanael's family in Wisconsin, where we got in a much appreciated dose of real winter. We went caroling, had some snowball fights, built a snowman (even though the snow was too cold to stick and we had to bring water out), went sledding, and appreciated the dog and chickens. On Christmas Eve the whole family sat around the table and made tamales, which were my favorite of our food of the holidays, however, delicious food was present in abundance..over abundance even. By the end of the week there were just too many delicious options available for indecisive individuals like myself.
  For the week around the lasts and firsts of the years 2010 and 2011 we were in New England with my family. We had the opportunity to go snowmobiling, see my older sister and brother-in-law's progress on their house, go to their New Year's Party, pick up their new dog with them (he's quite splendid), and go contra dancing with my good friend Lucy. We also saw the winter constellations and the Milky Way, which have always been visible at my parent's home, but look even more spectacular after having been away for a while.  Since Nathanael and I had been in Wisconsin on the 25th, my family delayed the Christmas celebration until after the New Year when we could all be there. I was so glad that Nathanael and I had finished all of our present making before we flew, and could just relax and look forward to being together and giving our fun gifts.


 Project #1 Colorful Art Tote for Asher


 Project #2 Floral Art Tote for my Mom


For the two of these I followed the Art Bag Tutorial on the blog From An Igloo, one of many blogs I discovered while I was searching for handmade gift ideas for our personality filled family. I changed the tutorial just slightly by turning what was supposed to be a ruler pocket into a brace to keep pencils or brushes flat. For Asher's I used three solid blends (blue, red and yellow) with 100% cotton bird fabric in the same colors to accent it, and I did my first covered button. For my Mom's I used two 100% cotton florals, which are some of my favorite fabrics that I have worked with, so you will be seeing this combination from me again. Both are padded with unbleached 100% cotton batting.

Projects #3 and 4 Turtles for my sister Melissa and Nathanael's Mom


 Those of you who have been reading for a while will recognize this, one of my first original patterns, from its premiere here in October. Since then I have added hand embroidered eyes and explored other fabric options. Melissa's has a body composed of a moss colored blend, and a 100% cotton shell (reversible, with opposite side unbleached muslin). Toni's has a body of yellow tie dyed 100% cotton and a shell similar to Melissa's, but dyed differently. Both are stuffed with unbleached 100% cotton batting.
    Now, you may ask yourself why I gave two grown women stuffed toys for Christmas. First, because they are amazing and the shells are reversible! Second, because in addition to the other Christmas presents, I had/have been making turtles like crazy because I hope to soon open an etsy shop! You can look forward to more news on that soon, but since my family members have been cheering on my sewing I thought they would enjoy a few of my first products.
(Ok, I admit we gave these two ladies other gifts too, like pecans we collected and granola we made.)

Next up I will show you the present I made for my Dad and two of the presents Nathanael made, so stay tuned!
  

Monday, December 13, 2010

Handmade Giveaways

This week from today, December 13th until December 17th, blogs across the internet (especially craft/sewing blogs) are participating in the annual Sew Mama Sew giveaway. I am not giving anything away this year because I am too backed up with Christmas presents (which are going to be splendid by the way), but I wanted to inform you. Most of the items being given away are either stylish handmade items (bags, potholders, socks, mittens, hats, games for kids, etc.), or supplies for sewing or knitting. So if you have a little bit of time, head over to Sew Mama Sew and look at the three enormous lists of participating blogs. All you need to do to enter on any of the blogs is leave a comment. Honestly, the hardest part of entering is trying to decipher the squished up letters in the spam filter.
If you see any amazing handmade items on other blogs (especially if they are good gift ideas), or if you win something, I would love to hear!

Tuesday, December 7, 2010

Advent

   
December has begun, and though I have a lot of things I hope to make and tasks I hope to accomplish, I wanted to take some time this year to appreciate the time of advent. To look back on all of the promises and the waiting before our Messiah arrived. And also to be thankful and joyful that I, that we, live on this side of the arrival of Christ. We don't need to wonder when our king will arrive, because he has come!
    So, I decided to make an advent calendar, not only to encourage myself to search for some of the historical hints of Jesus, but also to do a wee bit of decorating. Before I made the advent tree our only decorations were colorful stars (with bells) on two of our doorknobs. We won't have many decorations, since our celebrations will be elsewhere, but I thought something festive to help us reflect would be fitting.


If you would like to make your own advent calendar Christmas tree gather the following:
Large pieces of green paper (patterned or not)
Various colorful scraps of paper
String and a large needle you can thread it through
25 beads
scotch/sello tape
Scissors (and perhaps a paper cutter and punch)


You will see that I used scrapbooking paper (or I should say paper I make random things out of) for my green base paper. Cut four strips each 3 inches wide, and of decreasing lengths 10.5 in, 9.0 in, 7.5 in, 6.0 in, and one triangle for the top with a base measuring 4.5 inches from point to point.


For each of the four strips, fold the two ends downward, making the edges of the paper line up, to form the pointed layers of the tree. Don't cut these hidden corners off because they will help your tree pop out from the wall a bit.


Next, cut twenty-five 3 inch pieces of string, knot the ends, and place one bead on each string.


Then make marks on the back of each of your strips to note where you will thread your string. You should have seven on the bottom of the longest strip, six on the next, then five, four and three on the triangle which will be your top (as you can see on my little pink post-it above, or on the pictures of my finished tree). Evenly space them as best you can, and then use your needle to draw the string (carrying your bead) from front to back. If you pierce the paper from back to front the holes will look a little unfinished, and the bead will be on the wrong side.

 
Now cut 25 "ornaments" out of colorful papers. I was going to cut different shapes, but I ran out of time and needed to make dinner, so I used a 1-inch circular punch and cut uniform ornaments. Number the back of each ornament so you know the order in which you are affixing them to the tree, and also write the reference to the verses you choose for each advent reading. I encourage you to spend a little time searching for Old Testament verses pointing to the coming of Jesus, but since we are already into December and you may not have time to do this, I have provided some recommendations below.
 
 
Once you have prepaired your ornaments, use a piece of tape across the back (over your writing) to attach them to the beaded strings. I chose to have day one at the bottom left of the tree, and to finish the calendar with day twenty-five on the top right, but Nathanael was a little surprised with my choice, so do what seems most natural to you. Tape each panel of the tree (or use whatever method is approved by your landlord) to the wall, taping only the hidden corners of the strips so that the tree is slightly three dimensional and so the unread ornaments can remain slightly tucked beneath the tree. Once you read an ornament pull it down and line it up with the bead to create a double layer ornament. Ta da!
 

Below are the readings I selected. You may rearrange them, or select other verses if you have a little time.
But even if you don't make an advent calendar they are worth reading as Christmas approaches.
 1. Genesis 3:14-15  
2. Genesis 12:1-3  
3. Genesis 15 
4. Genesis 22:1-19 
5. Genesis 28:10-22 
6. Exodus 11:1-12:30 and 13:1-16 
7. Exodus 24:1-11  
8. Leviticus 16:1-34 
9. Numbers 21:4-8  
10. II Samuel 7:16 and 23:1-7
11. I Chronicles 17:7-15  
12. II Kings 6:8-23 (this one is hear just because it's neat)
13. Job 9, especially verses 32-35  
14. Psalm 22
15. Isaiah 9:1-7 
16.Isaiah 11:1-5
 17. Isaiah 52:13-53:12
18. Jeremiah 23:1-6
19. Ezekiel 34
20. Daniel 9:20-24
21. Micah 5:2-5 and 7:18-20
22. Zechariah 12:18-13:1
23. Malachi 3 and 4:5-6
24. Matthew 1:17-2:23
25. Matthew 3 and Luke 2
Related Posts Plugin for WordPress, Blogger...